Today, we are excited to announce a number of improvements to our Verkada Command platform with a focus on improving the navigation and usability of the platform.
New Look for the Camera Page
The Camera Page enables you to monitor your camera’s live feed, review historical footage, create archives, conduct motion searches, and gain insights from people and vehicle analytics. We have redesigned the entire page to make it more intuitive to use and to help speed up your investigations. Live stream controls are now on the right hand side of the video player to give you a bigger and cleaner view of the camera feed. New icons and a cleaner look simplify navigation and improve readability.
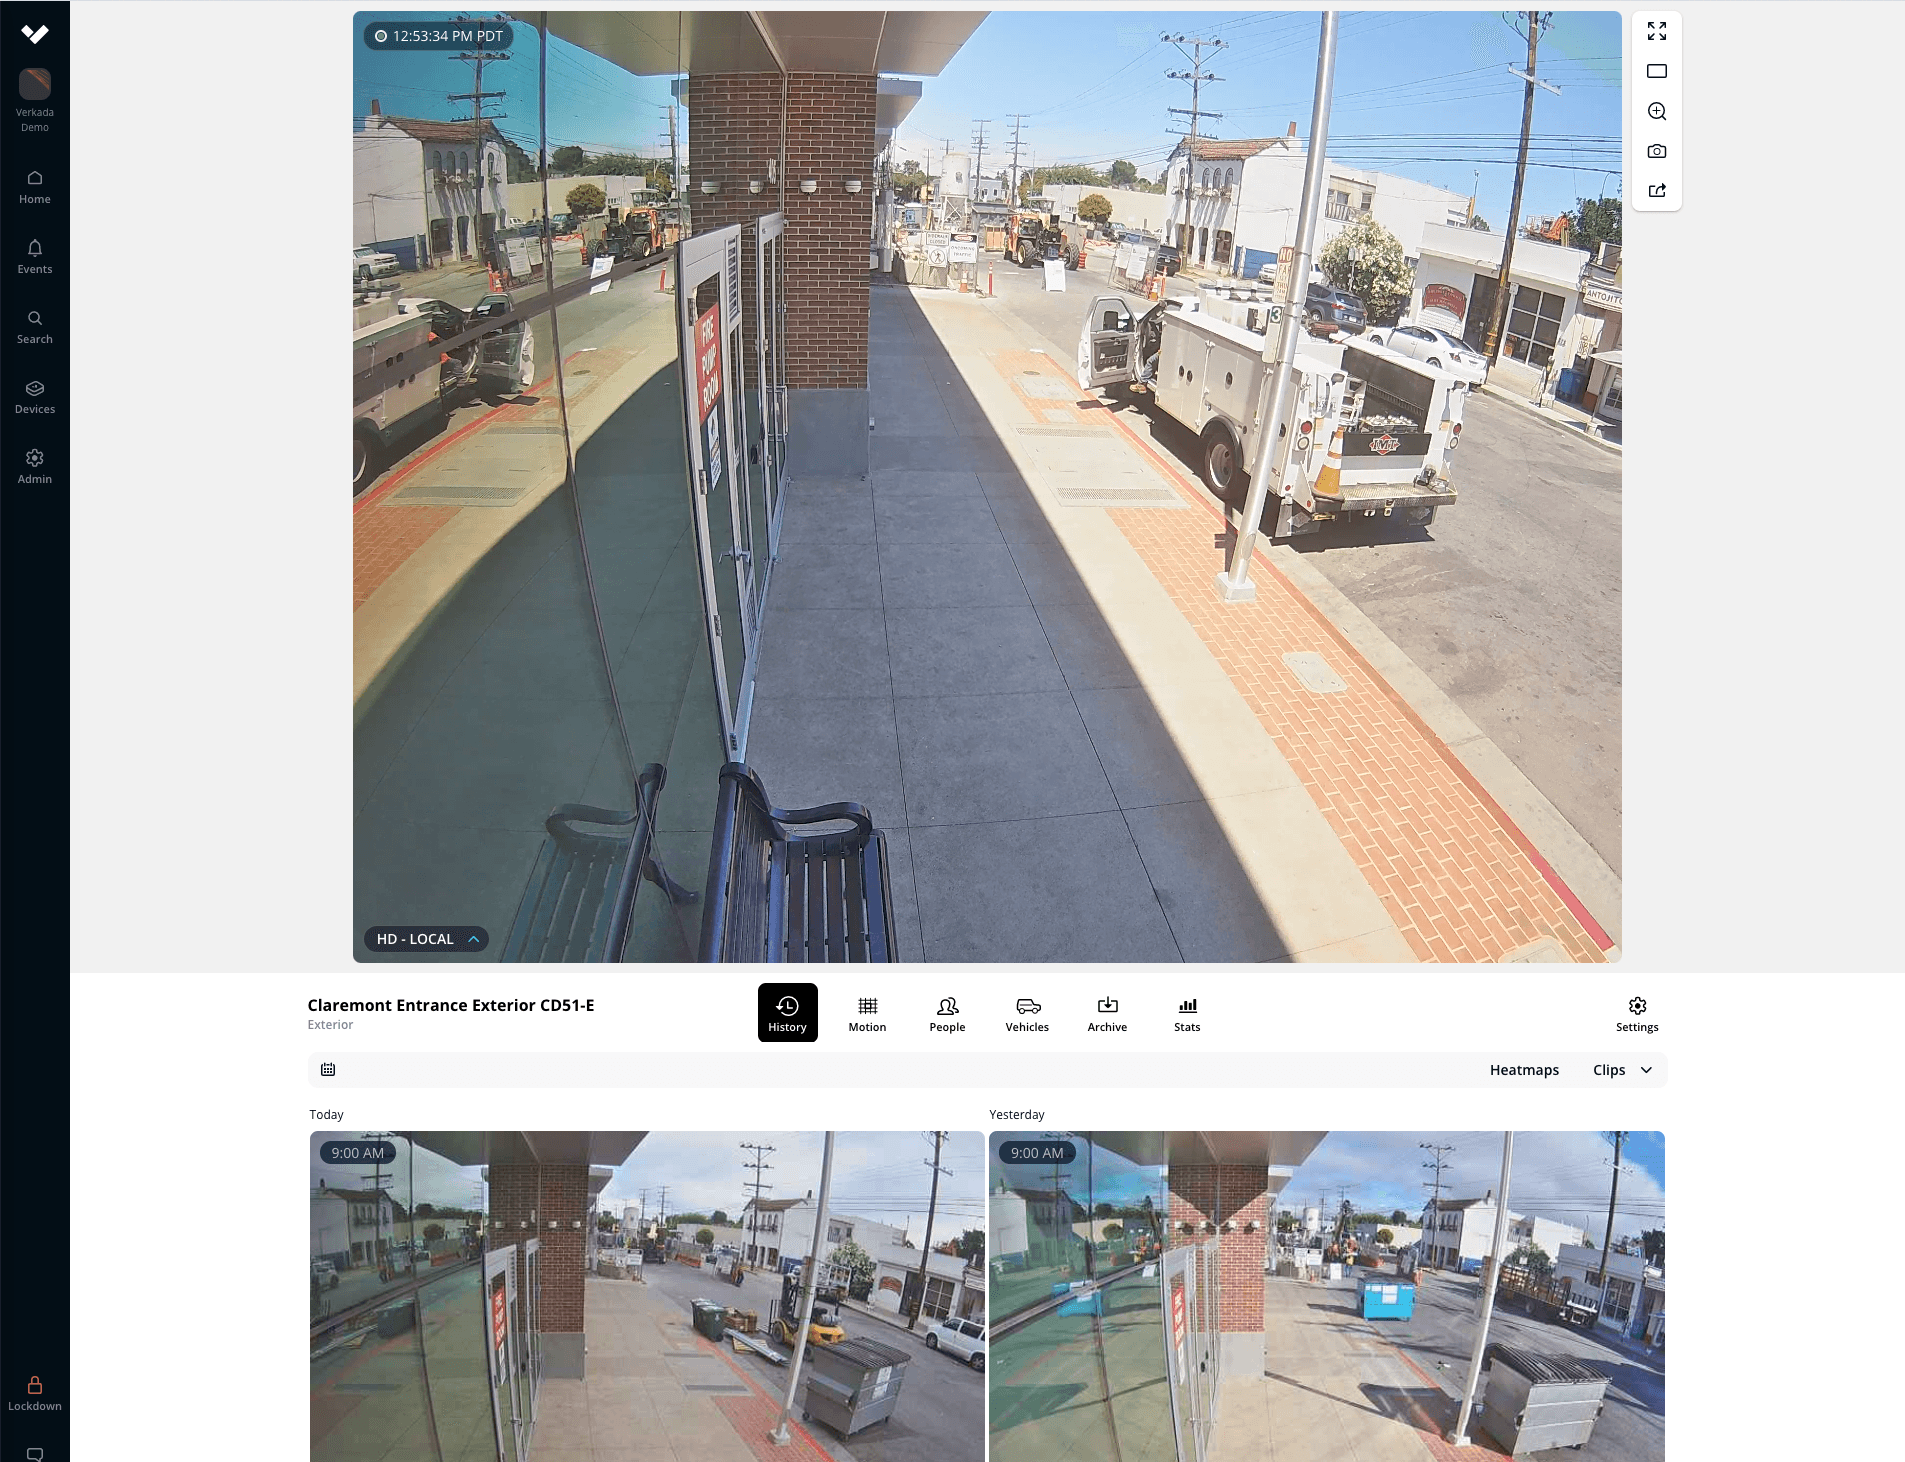
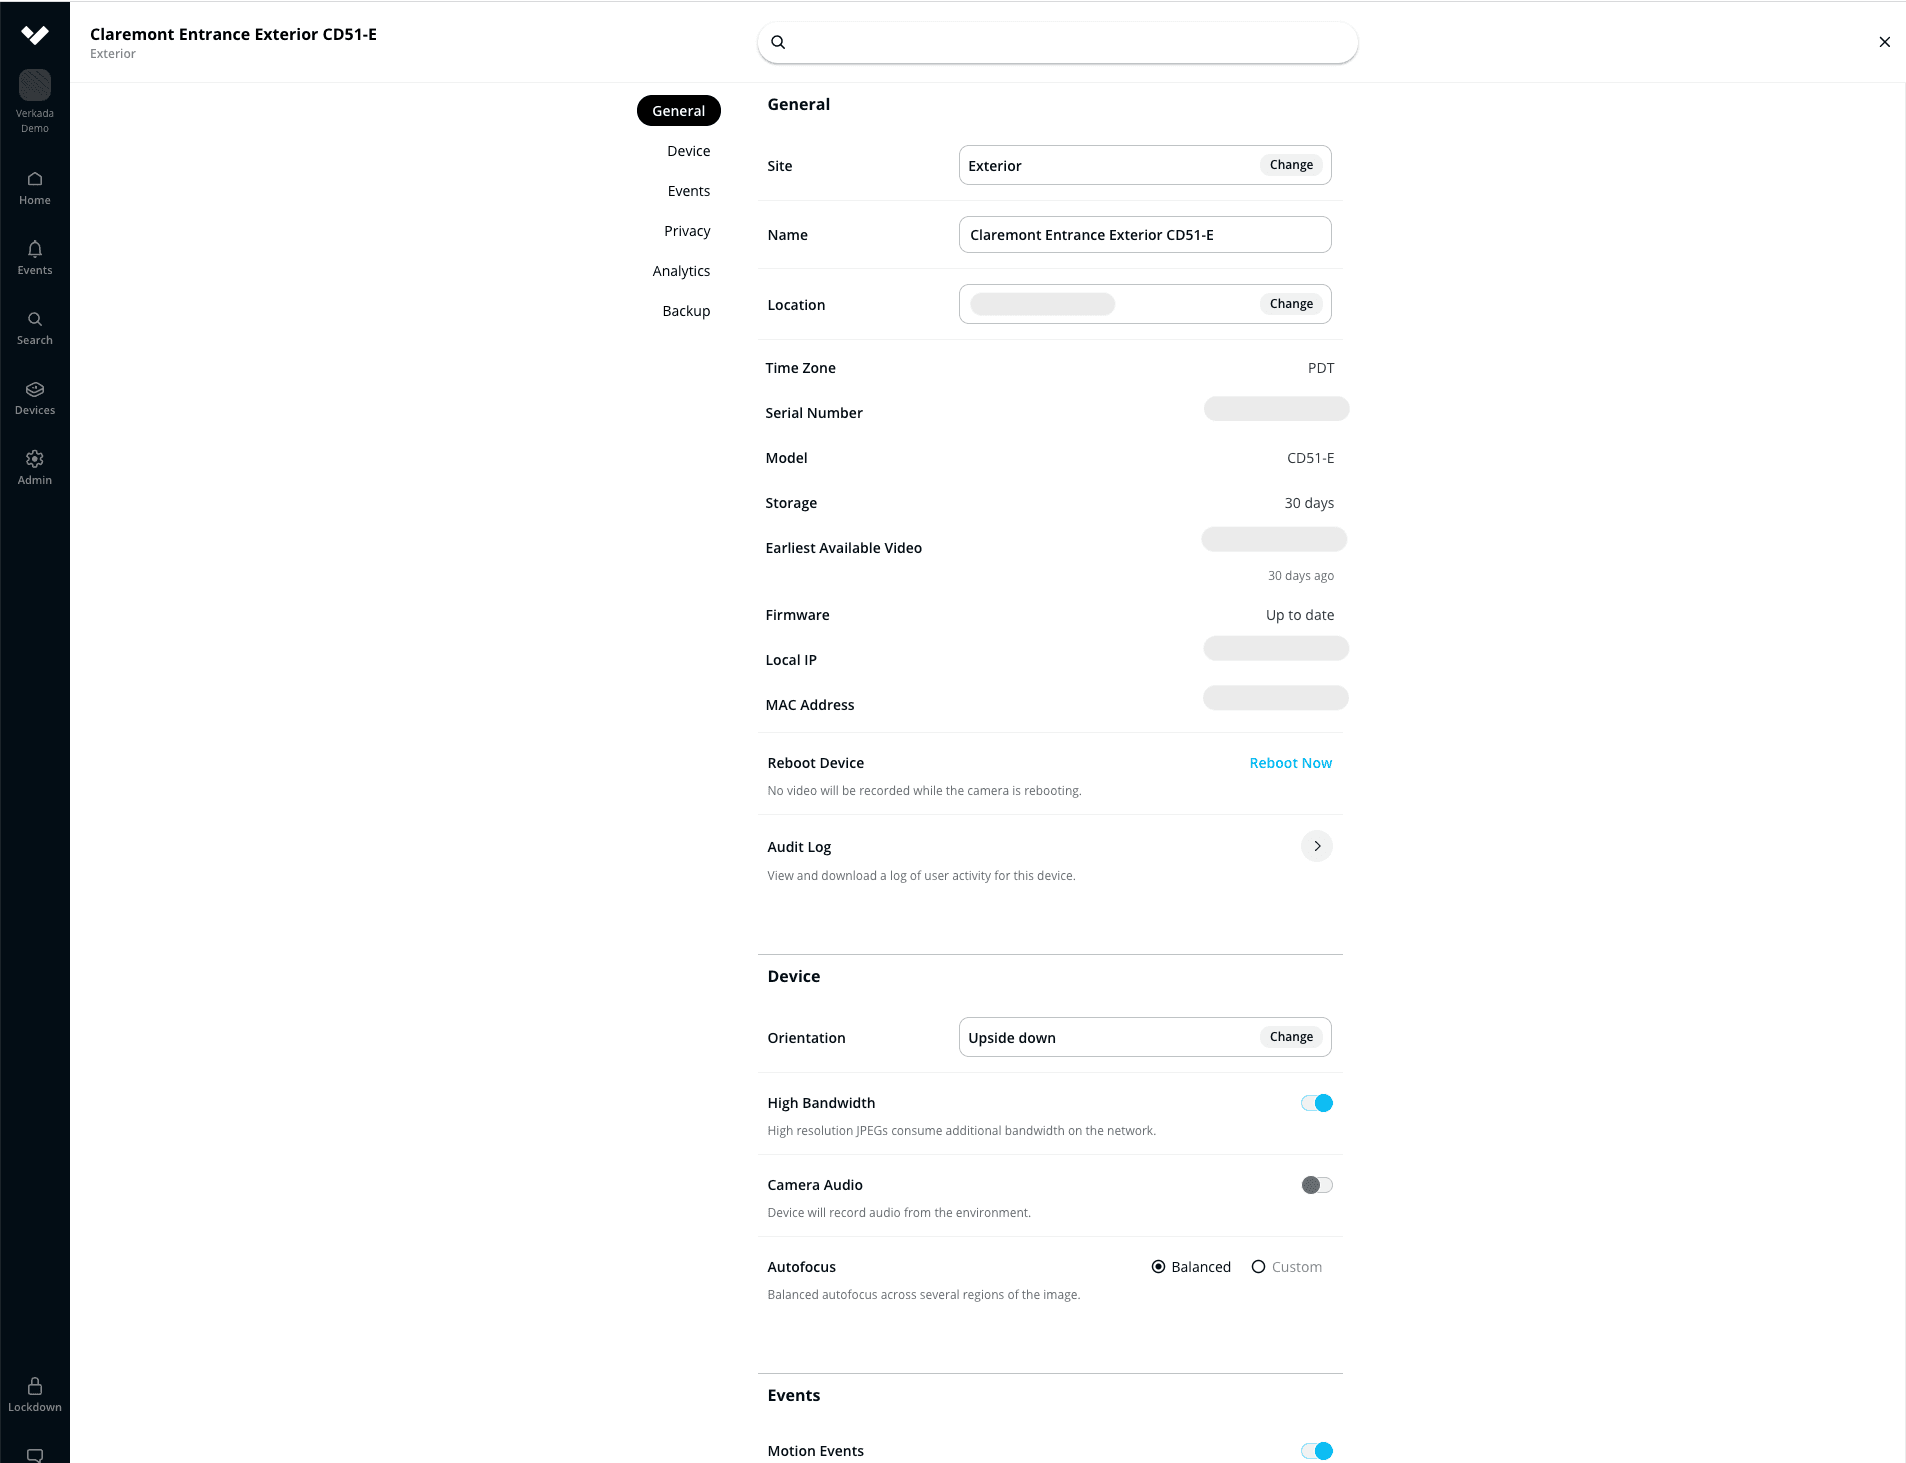
We’ve also updated the Settings tab and added a search bar to make it easy to find what you are looking for.
Reorder Cameras on the Home Page
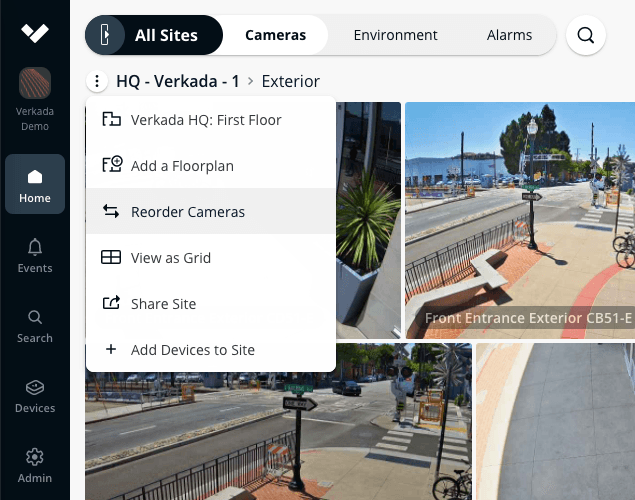
Users want to be able to order cameras on the Home Page based on what matters most to them. Now you can also customize the layout of the cameras on the Home Page.
Step 1: click on the site option menu next to the site name, choose ‘Reorder Cameras.’
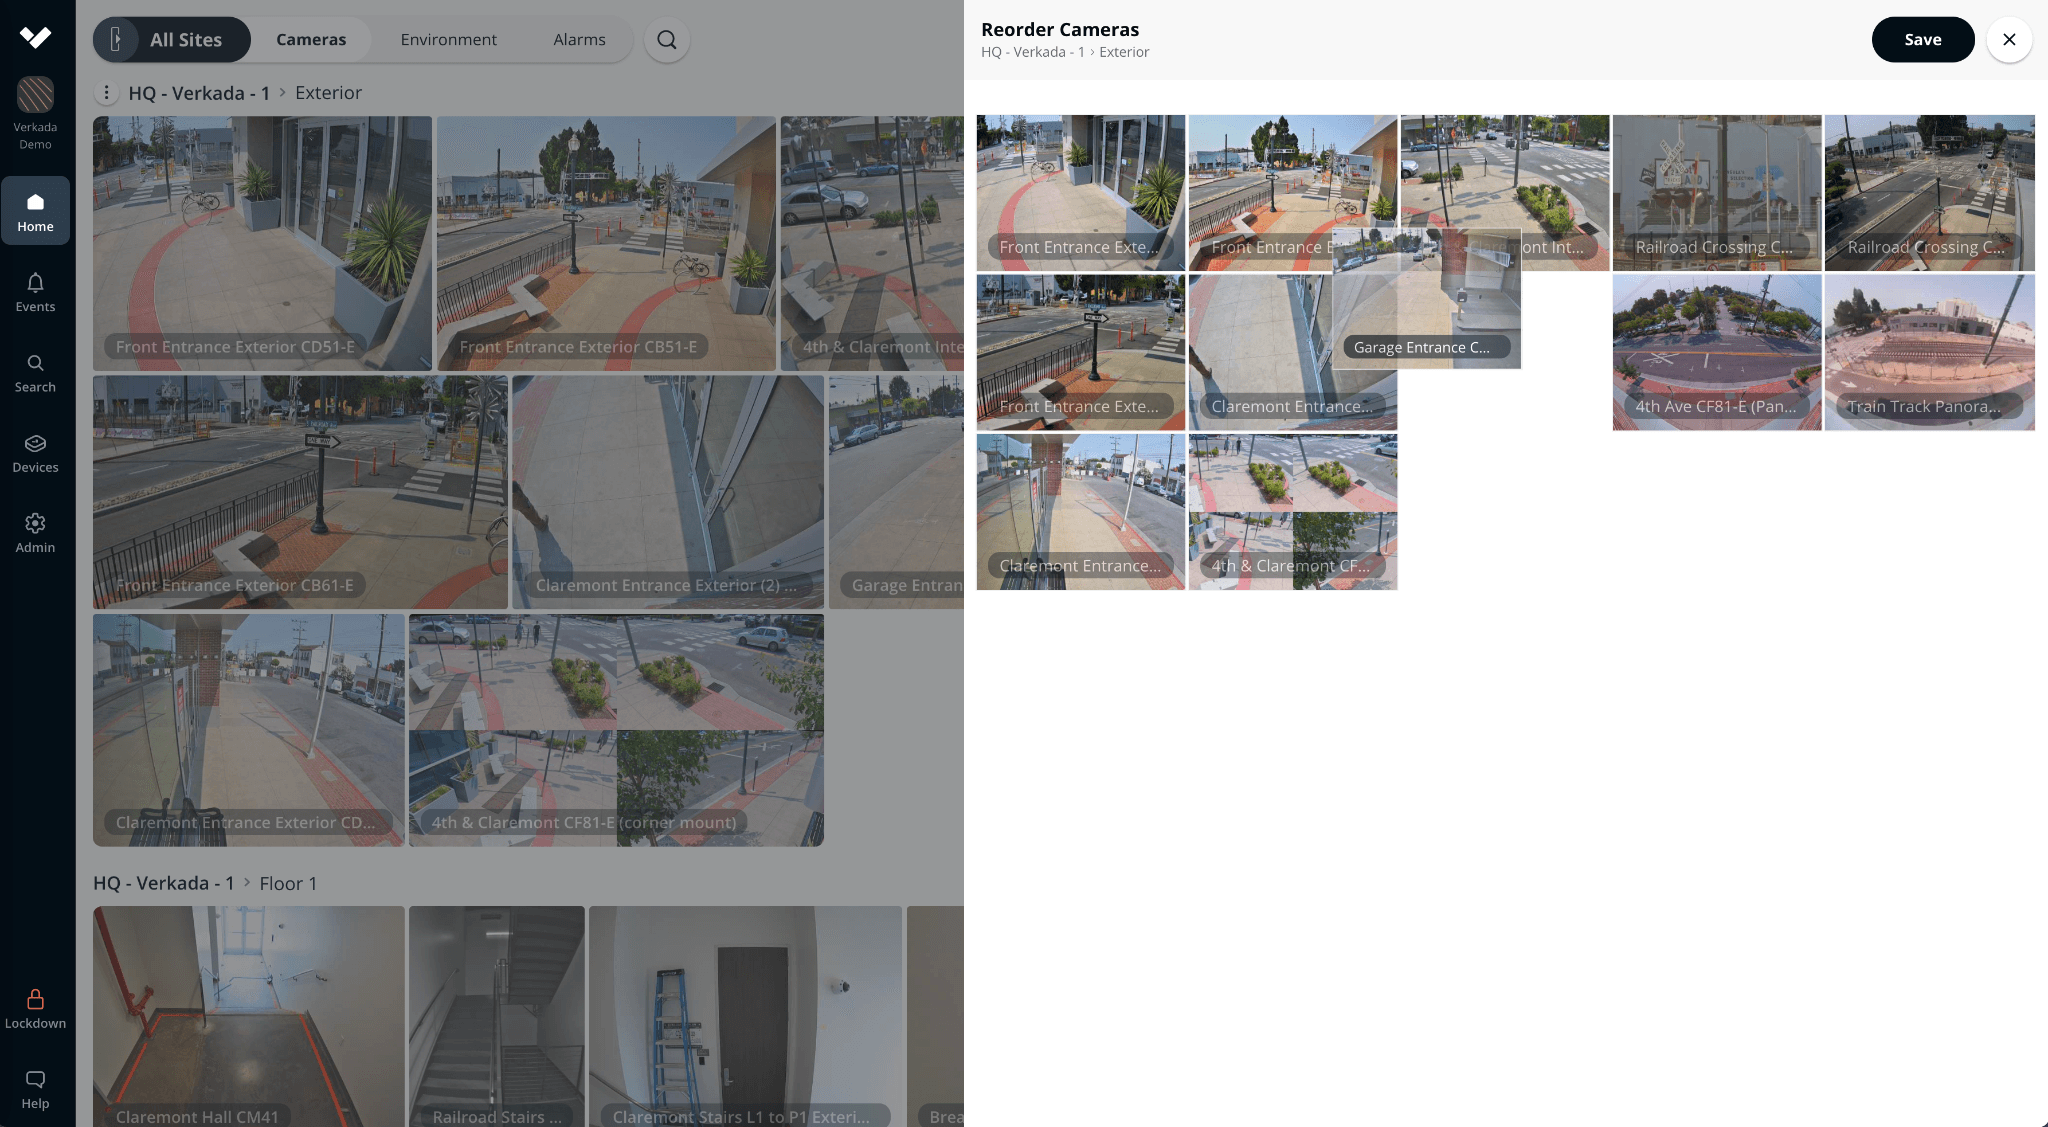
Step 2. Drag and drop the cameras in the order that works best for you.
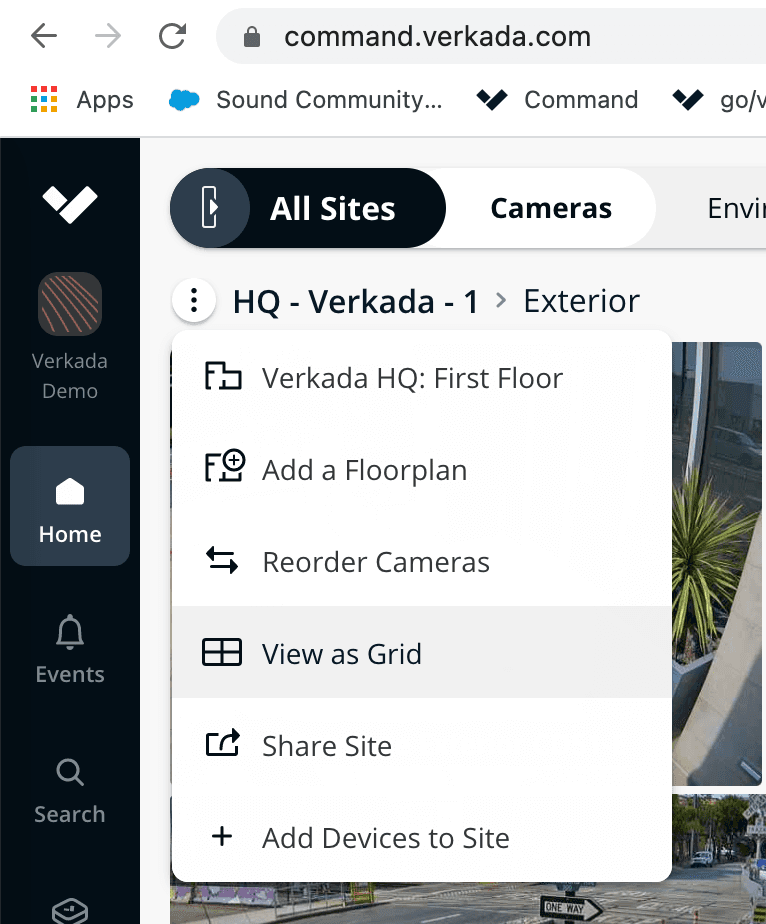
Sites to Grid
Our Grids feature helps you monitor multiple camera views in real time. We have now made it easy to create a Grid of all of the cameras in a Site on the fly. Click on the site option menu next to the site name and choose ‘View as Grid.’
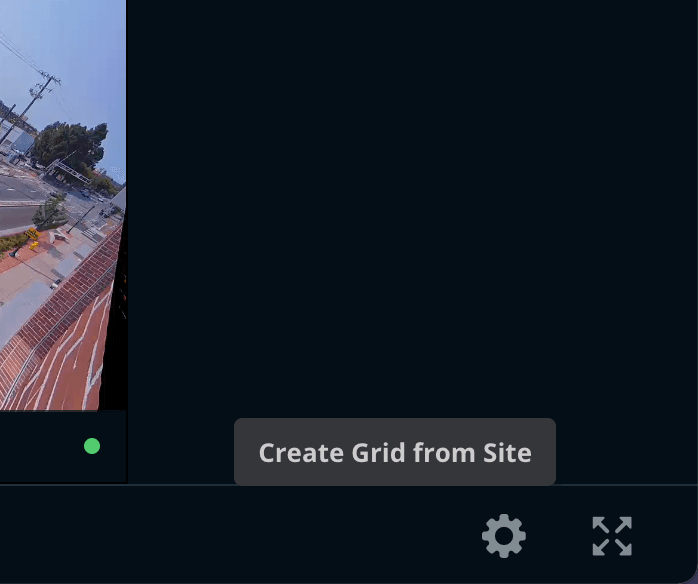
If you want to save the Grid, you can click on the gear icon on the bottom right corner and choose ‘Create Grid from Site’.
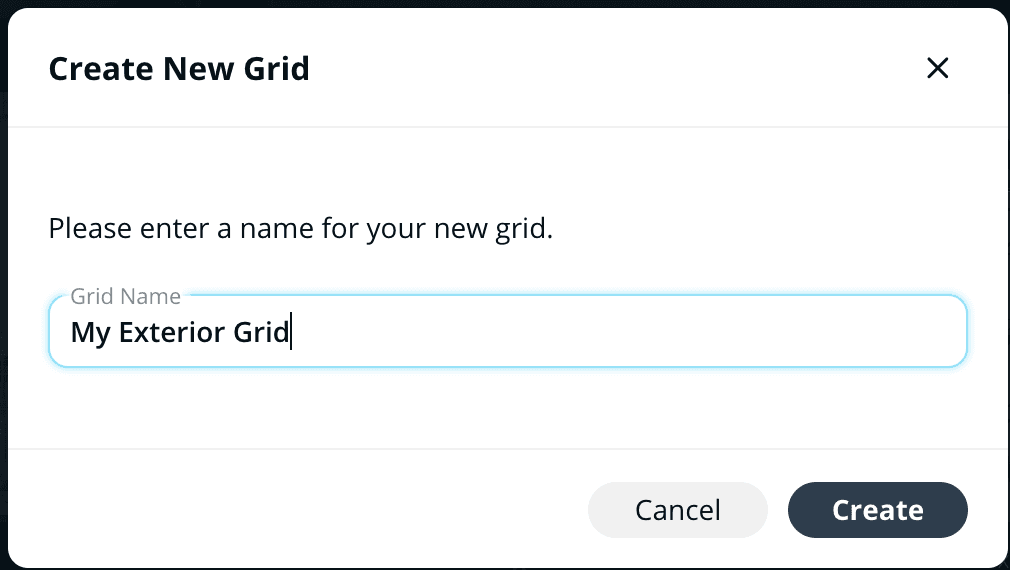
Then enter a name for the grid and hit the ‘Create’ button. Once created, you can access it anytime from the Grids menu on Home Page.
Public Grids
You can now create Public Grids for sharing with others in the same organization! To create a Public Grid, go to a Grid that you want to make public, then click on the gear icon in the bottom right corner and click ‘Make Public’. It’s that simple! Once a grid is marked public, it will show up automatically in the Grids list for other users in the same organization.
Anyone (Site Admin, Site Viewer, Live-only Viewer) can create Public Grids and Public Grids can be viewed by anyone. However, if a user doesn’t have access to one or more cameras in the Grid, they can’t view the streams and the cameras appear as ‘Access Restricted’. If a user has access to none of the cameras in the Public Grid, the Grid doesn’t show up in that user’s Grid list.
Only the Public Grid creator can make changes to the Grid settings and delete it. Everyone else (including other org admins) can only view Public Grids. Public Grids have the name of the creator displayed at the top, below the Grid name to denote who created the grid for audit and permission seeking purposes.

Archive Success Emails
Whether you create a 5 minute archive or a 5 hour archive, you’ll get an email that your archive has completed so that you don’t have to sit and stare at the screen to understand the status. The email contains a link to the archive as well so you can jump straight to the archive.


